Tuesday, March 22, 2011
How to Generate XML using Microsoft Excel 2007
Labels:
XML
For e.g. First create a sample of xml (i.e. the format in which you need to export your data in excel).
Open notepad and create your schema. For e.g. Suppose I need the format as below
<students>
<student>
<id>1</id>
<name>Vinod</name>
</student>
<student>
<id>2</id>
<name>Sandeep</name>
</student>
</students>
Now save the notepad file as example.xml (or provide any file name plus add ".xml" at the end of the filename).
Now open the excel file from which you need to generate your XML.
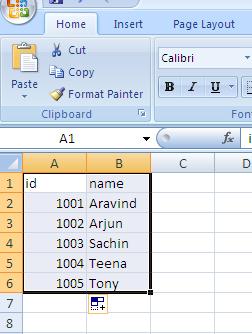
For example let the excel file be as show below

Now select the entire data as shown below.
Select HOME tab and click FORMAT AS TABLE and select the first layout as shown below and click OK
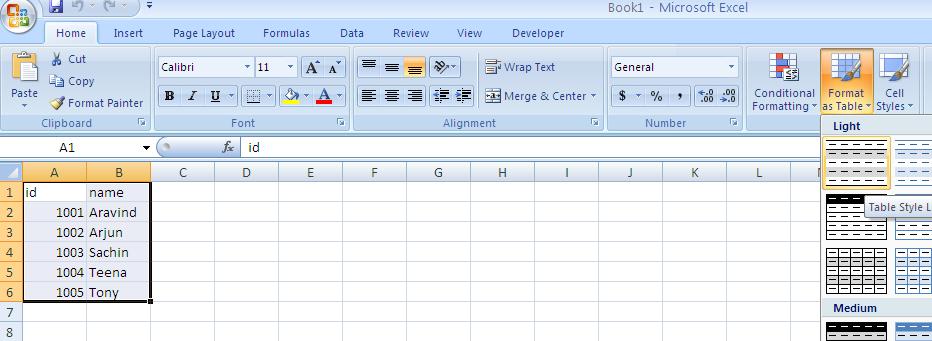
On working out the above step your data will look as below.

Now from the tab (next to "View") select Developer tab. If you are not having any DEVELOPER tab do the following:
Click the Microsoft Office Button  , and then click Excel Options.
, and then click Excel Options. 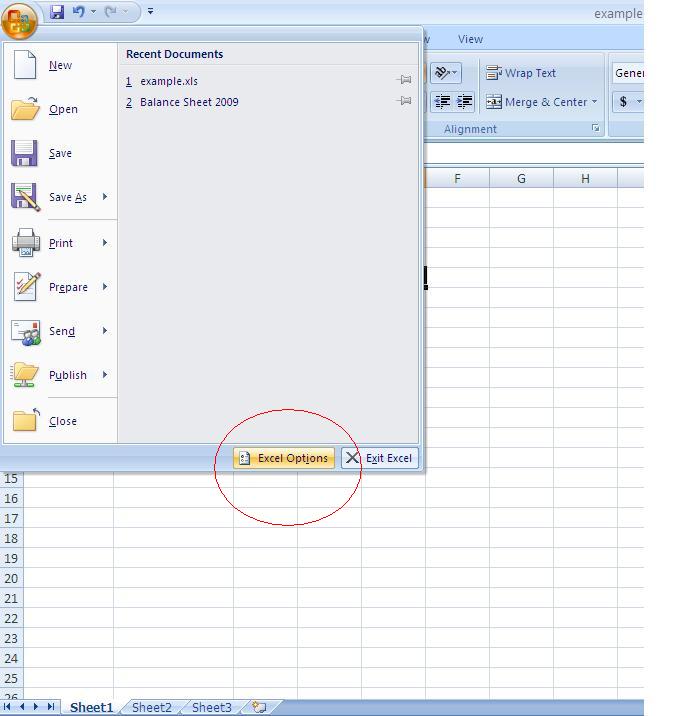
In the Popular category, under Top options for working with Excel, select the Show Developer tab in the Ribbon check box, and then click OK.

Now as circled in the figure below you can find the Developer tab

As shown in the figure below click the SOURCE button

On the right side of the excel window you will find an XML Source pane. Now from the pane click on the button XML Maps.

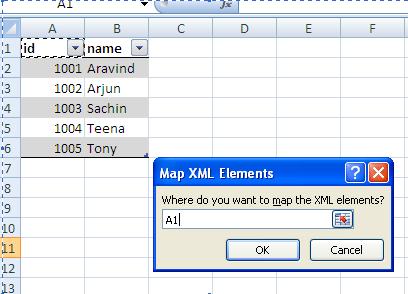
On clicking XML Maps, a dialog box appears. Now click ADD from the dialog box and select the XML sample file that you created in the first step (i.e. example.xml). Now the dialog box appears as shown below. And then click OK

Now the XML Source pane appears as shown below.

Now right click on one of the fields (i.e. id, name) in the XML Source pane as show below.

Now click on the Map Element and select the Column Header to which you want to map that field. Here since I selected field id, I selected the column header id which is in A1 and click OK. Repeat the same for the name field also.
Now as shown below select DEVELOPER tab and select the Export button (circled below). A dialog box appears where you can type the file name to which you want to export the file and then click Export in the dialog box.

Now open the file you exported. Open in notepad or some other editors. The content will be as shown below:
<students xmlns:xsi="http://www.w3.org/2001/XMLSchema-instance">
<student>
<id>1001</id>
<name>Aravind</name>
</student>
<student>
<id>1002</id>
<name>Arjun</name>
</student>
<student>
<id>1003</id>
<name>Sachin</name>
</student>
<student>
<id>1004</id>
<name>Teena</name>
</student>
<student>
<id>1005</id>
<name>Tony</name>
</student>
</students>
Thank you..
Subscribe to:
Post Comments (Atom)
No comments:
Post a Comment